
블로그 헤더 및 사이드바 변경
1. _config.yml 파일 변경
처음에 블로그를 시작하면 아래와 같은 화면이 나타납니다.
포스트를 작성하는 기본적인 방법은 여기에 있습니다.
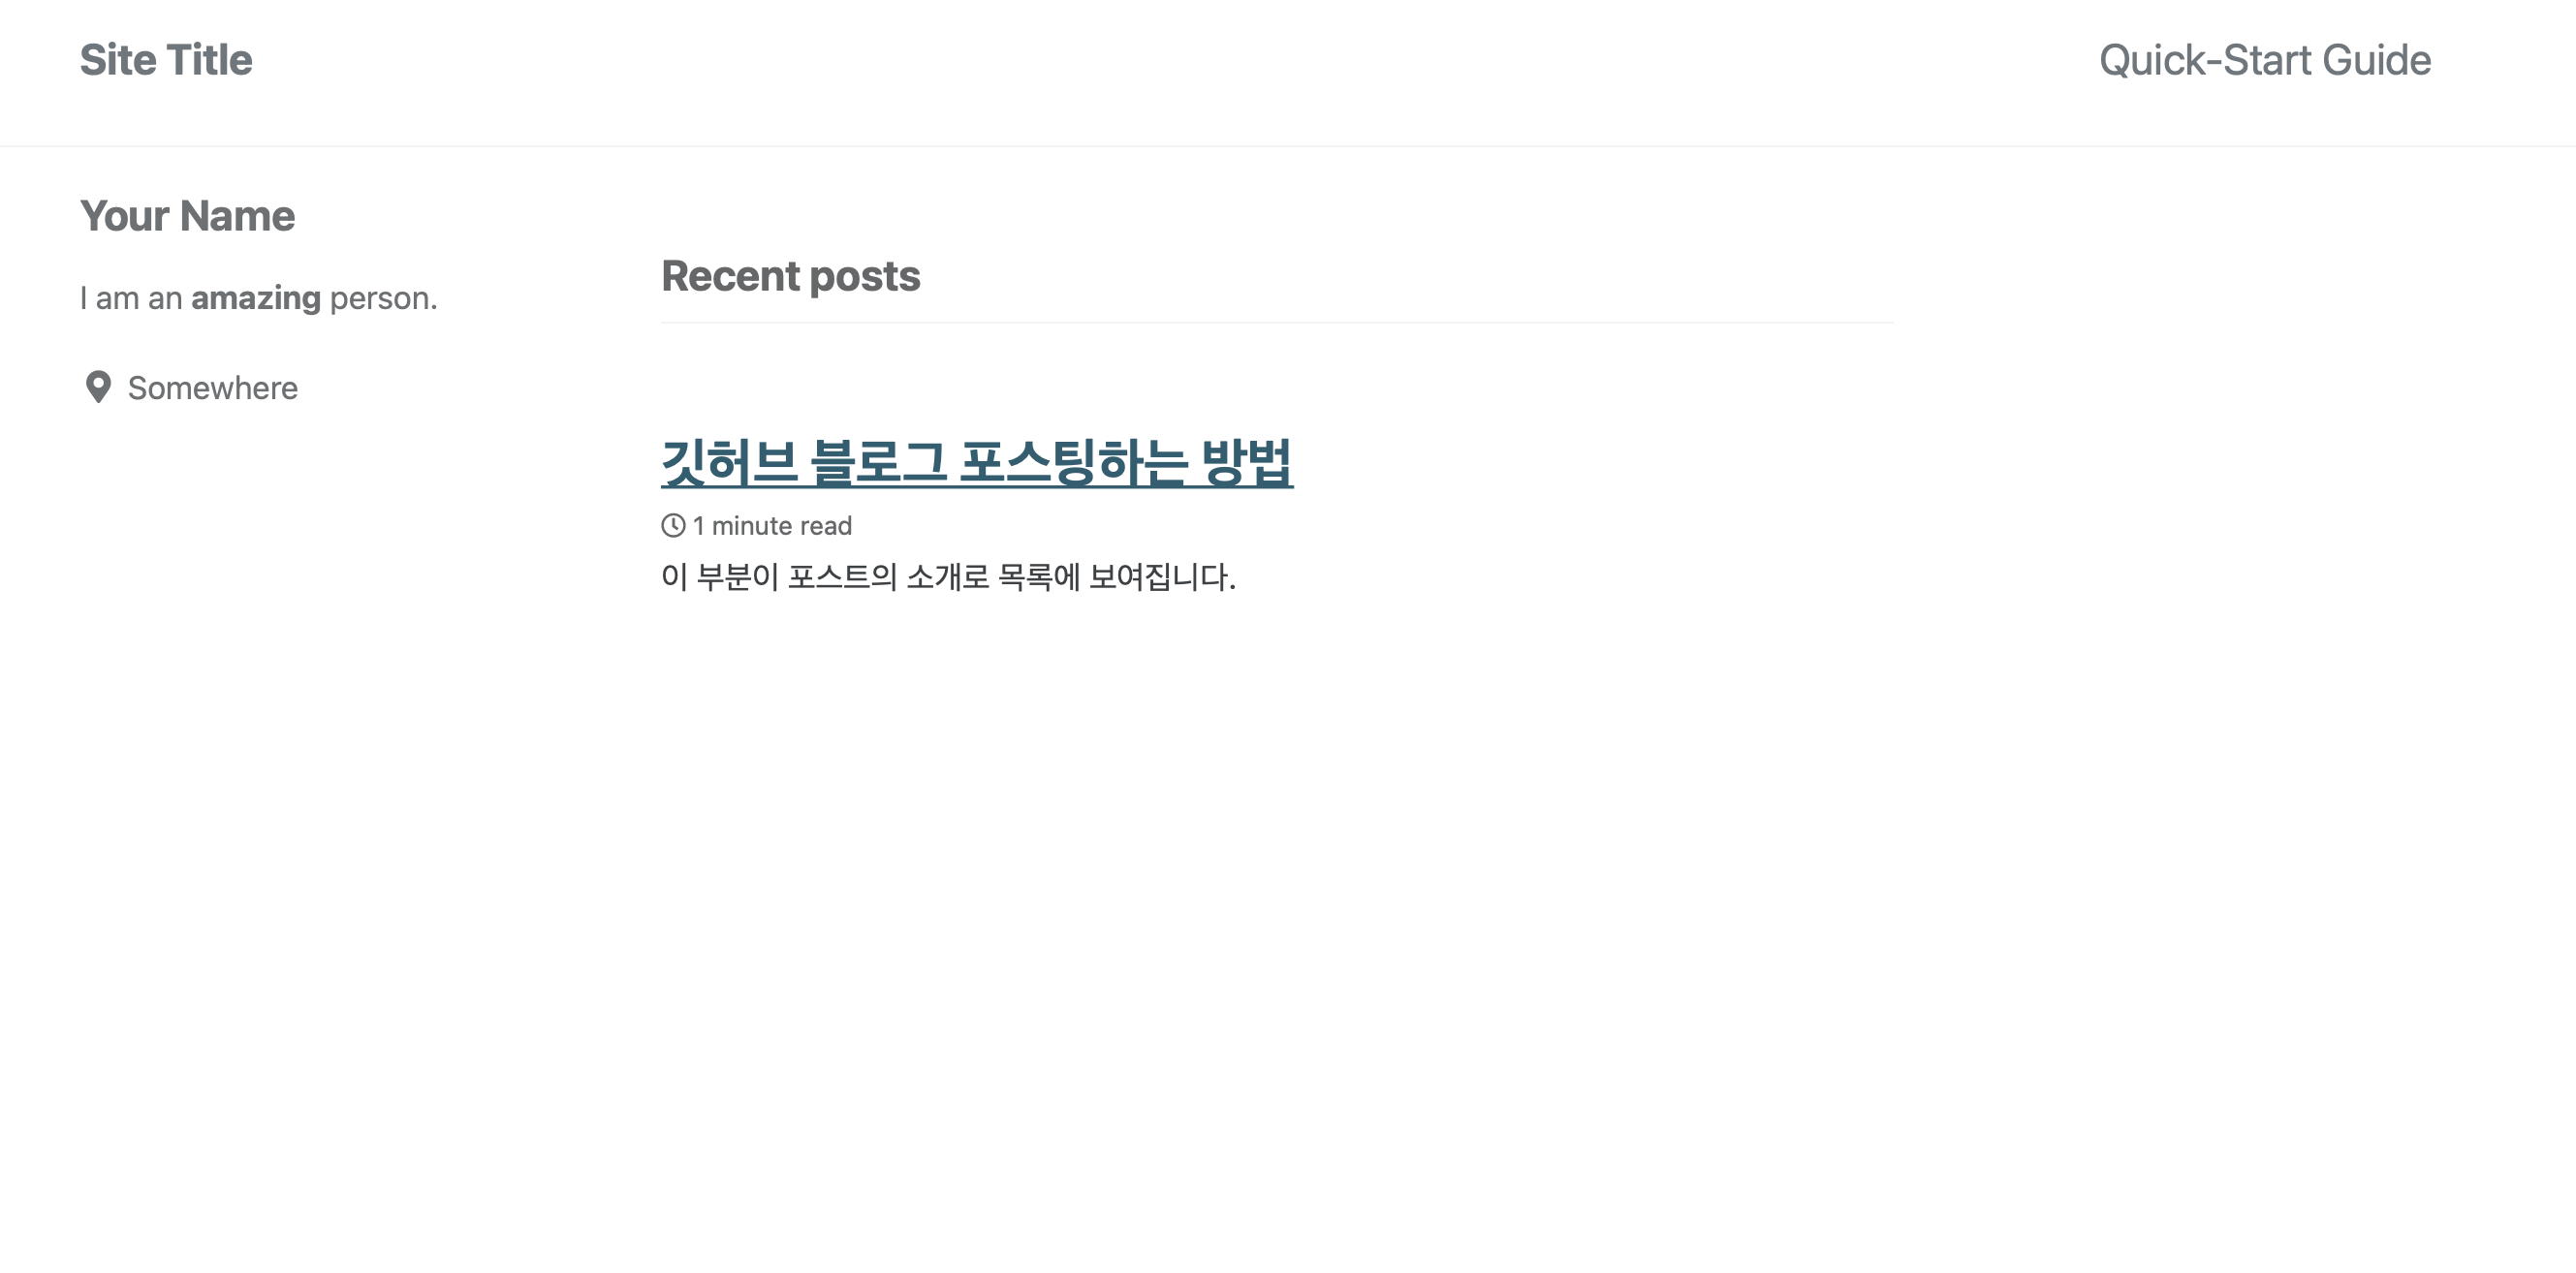
기본 값이므로 헤더에 Site Title과 Quick-Start Guide 라고 적혀있는 것을 볼 수 있습니다.
헤더 부분은 프로젝트의 _config.yml 파일에서 바꿀 수 있습니다.
minimal mistake 템플릿의 프로젝트 구조는 다음과 같습니다.
minimal-mistakes
├── _data                      # data files for customizing the theme
|  ├── navigation.yml          # main navigation links
|  └── ui-text.yml             # text used throughout the theme's UI
├── _includes
|  ├── analytics-providers     # snippets for analytics (Google and custom)
|  ├── comments-providers      # snippets for comments
|  ├── footer
|  |  └── custom.html          # custom snippets to add to site footer
|  ├── head
|  |  └── custom.html          # custom snippets to add to site head
|  ├── feature_row             # feature row helper
|  ├── gallery                 # image gallery helper
|  ├── group-by-array          # group by array helper for archives
|  ├── nav_list                # navigation list helper
|  ├── toc                     # table of contents helper
|  └── ...
├── _layouts
|  ├── archive-taxonomy.html   # tag/category archive for Jekyll Archives plugin
|  ├── archive.html            # archive base
|  ├── categories.html         # archive listing posts grouped by category
|  ├── category.html           # archive listing posts grouped by specific category
|  ├── collection.html         # archive listing documents in a specific collection
|  ├── compress.html           # compresses HTML in pure Liquid
|  ├── default.html            # base for all other layouts
|  ├── home.html               # home page
|  ├── posts.html              # archive listing posts grouped by year
|  ├── search.html             # search page
|  ├── single.html             # single document (post/page/etc)
|  ├── tag.html                # archive listing posts grouped by specific tag
|  ├── tags.html               # archive listing posts grouped by tags
|  └── splash.html             # splash page
├── _sass                      # SCSS partials
├── assets
|  ├── css
|  |  └── main.scss            # main stylesheet, loads SCSS partials from _sass
|  ├── images                  # image assets for posts/pages/collections/etc.
|  ├── js
|  |  ├── plugins              # jQuery plugins
|  |  ├── vendor               # vendor scripts
|  |  ├── _main.js             # plugin settings and other scripts to load after jQuery
|  |  └── main.min.js          # optimized and concatenated script file loaded before </body>
├── 👉_config.yml                # site configuration
├── Gemfile                    # gem file dependencies
├── index.html                 # paginated home page showing recent posts
└── package.json               # NPM build scripts
위 구조의 밑에서 4번째에 위치한 _config.yml이 저희가 손 볼 파일로, 프로젝트 최상단에 위치해 있습니다.
변경 전 참고로 이야기하자면,
_config.yml파일은 다른 파일과 달리 jekyll serve 를 이용해 서버를 띄웠을 때 파일 내용이 바뀐다고 자동으로 반영되지 않습니다.
따라서 변경 내용을 확인하려면 서버를 재시작해야합니다.
2. _config.yml 변경
2-1. 스킨 변경
스킨은 아래 항목을 지정하여 바꿀 수 있습니다.
minimal_mistakes_skin : "default"
지원하는 스킨 목록은 다음과 같습니다.
air, default, aqua, contrast, dark, dirt, neon, mint, plum, sunrise
스킨 모양 보러 가기
2-2. Site locale
locale은 블로그에서 사용할 언어 세팅으로 아래와 같이 바꿀 수 있습니다.
locale : "en-US"
여기서 세팅하는 언어를 가지고 프로젝트 _data/ui-text.yml 파일에서 값을 읽어 블로그의 각 부분에 나타냅니다.
예를 들어 en으로 locale을 설정했을 때 _data/ui-text.yml의 en 파트 하에
toc_label : "On this page"
항목이 있음을 알 수 있는데, toc_label은 포스트 내의 헤더를 기준으로 목차를 생성하는 설정에 관련된 부분입니다.
텍스트가 On this page로 설정되어 있기 때문에 실제로 목차 부분의 제목도 On this page로 나오는 것을 볼 수 있습니다.

2-3 Site title
title은 화면의 좌측 상단 메인 타이틀을 바꾸는 부분입니다.
title: "Yoonjae's Archive"
위처럼 내용을 바꾸면 화면의 메인 타이틀이 바뀌게 됩니다.
2-4 Site name
name은 사이트의 author를 설정할 수 있게 해줍니다.
name: "author's name"
블로그의 가장 아래 footer에 나오게 됩니다.
2-5 Site logo
블로그의 기본 프로필 로고를 설정할 수 있습니다.
사진은 블로그의 좌측 최상단에 위치한 Title의 왼편에 반영됩니다.
logo: "/assets/img/profile.jpeg"
2-6 날짜 보이게 하기
_config.yml의 가장 밑의 아래 코드에 show_date항목을 true로 추가하면 포스트 목록에서도 포스트가 작성된 날짜를 볼 수 있습니다.
이 때 어떤 형식으로 날짜를 보여줄 지 date_format도 함께 지정해줘야 합니다.
# Defaults
defaults:
  # _posts
  - scope:
      path: ""
      type: posts
    values:
      layout: single
      author_profile: true
      read_time: true
      comments: # true
      share: true
      related: true
      show_date: true
      date_format: "%Y-%m-%d"
3. 사이드바 설정
블로그의 왼편 사이드 바에 정보를 기입하는 부분입니다.
이 부분 역시 _config.yml을 설정해서 진행하는데, _config.yml의 author 부분을 수정하겠습니다.
# Site Author
author:
  name             : "이름"
  avatar           : "프로필 이미지 경로"
  bio              : "한 줄 설명"
  # location         : "Somewhere"
  email            :
  links:
    - label: "Email"
      icon: "fas fa-fw fa-envelope-square"
      url: "mailto:yuyun3599@gmail.com"
    - label: "Website"
      icon: "fas fa-fw fa-link"
      # url: "https://your-website.com"
    - label: "Twitter"
      icon: "fab fa-fw fa-twitter-square"
      # url: "https://twitter.com/"
    - label: "Facebook"
      icon: "fab fa-fw fa-facebook-square"
      # url: "https://facebook.com/"
    - label: "GitHub"
      icon: "fab fa-fw fa-github"
      url: "https://github.com/yunyun3599"
    - label: "Instagram"
      icon: "fab fa-fw fa-instagram"
      # url: "https://instagram.com/"
위의 내용 중 원하는 부분을 본인의 정보에 맞게 채우면 사이드 바 설정도 끝이 납니다.
3. navigation 설정
블로그 우측 상단에 있는 네비게이션 바를 설정할 수 있게 해주는 부분입니다.
프로젝트 내의 _data/navigation.yml 파일을 수정해서 반영할 수 있습니다.
저는 간단하게 Home 버튼이 블로그 메인 화면으로 연결되도록 바꾸어 보았습니다.
# main links
main:
  - title: "Home"
    url: https://yunyun3599.github.io